Tag Archives: recipes

It’s a cookie biscuit! Or is it a biscuit cookie? Or maybe…a biskie!

Biscuit meets cookie

Scones. Buttery rich morsels of goodness with a delicate biscuit-like crumble and a light hint of sugar. Mmm, delicious. And also the inspiration for the experiment below.

One day I was sitting around thinking yet again about eating scones, when I began to ponder about its similarities to biscuits. To me, scones basically taste like a more rich, dense (and slightly drier) biscuit with sugar (and chocolate chips!). So then I figured…if I took biscuit dough…and mixed it with cookie dough (to give it the more dense consistency and sweeter flavor)…wouldn’t I get a scone? And better yet, they seem to bake at the same temperature for almost the same amount of time. Well, below is what happened…

First of all, I would like to note that I did not bother mixing the two doughs together with a mixer and instead opted to mix by hand. Not sure why, but that could’ve been a more conclusive experiment. Anyways, on to the results:

Half biscuit + Half cookie

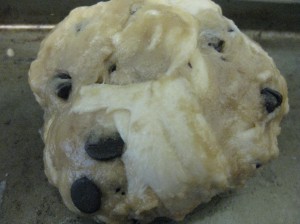
For this test, I used equal parts of biscuit dough and cookie dough and mashed it together by hand.

Biscuit cookie: 1

Half biscuit + half cookie dough

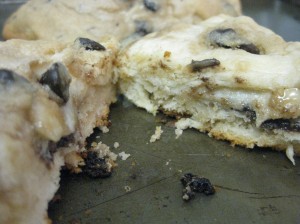
Baked the dough at 375 degrees for 20 minutes (this took a LONG time to cook) and came out with…

Half biscuit + half cookie baked

Half biscuit + half cookie baked

Not bad, actually. Did not taste like a scone (by any stretch of the imagination), but it was interesting. It was like eating a biscuit, with layers of chewy cookie dough. Kind of like eating a Taiwanese dessert called Lao Po Bing, where a layer of mochi filling is wrapped around with a flaky, buttery pastry. But with much less defined layers. Onto the next one!

I also tried mixing 1/3 biscuit and 2/3 cookie dough and in the end, I’d say not to go that route. I won’t even post pictures. Next!

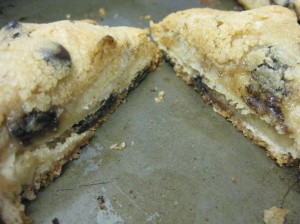
Finally, I tried a combo of 2/3 biscuit and 1/3 cookie dough.

2/3 biscuit + 1/3 cookie

2/3 biscuit + 1/3 cookie

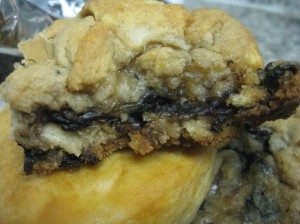
This was by far my favorite. This cookie required the least amount of baking (about 12-13 minutes) and resulted in a nice balance of dry and gooey texture.

2/3 biscuit + 1/3 cookie baked

2/3 biscuit + 1/3 cookie

If I ever made these again, I would be sure to use the 2/3 biscuit and 1/3 cookie combo. And I’d probably try mixing with an actual mixer. And bake smaller pieces – these cookie biscuits are REALLY quite rich! But unfortunately, they did not turn into scones. Another day, I suppose!

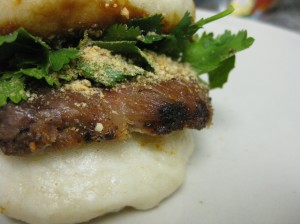
Pork Belly Buns – The Original!

Homemade Pork Belly Buns


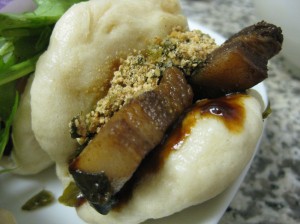
Taiwanese pork belly bun

Pork belly bun (but with the addition of hoisin sauce...and I forgot the cilantro!)

Taiwanese pork belly buns (刮包), simply put, are amazing. Braised pork belly sandwiched between fluffy white buns (also known as mantou or 饅頭) sprinkled with pickled mustard greens, crushed peanut powder, and cilantro…it’s really now wonder why interpretations of these buns have been popping up everywhere (think Momofuku, Baohaus, etc.).

Inspired by this recipe request for pork belly buns (2011/03/06 recipe wanted: pork belly buns aka taiwanese hamburger), I set out to create my own homemade pork belly buns! Once I had the buns ready (steamed buns part II), the world – or more like these buns – was my oyster. All that was left was to braise my pork belly and prepare the toppings!

For the traditional pork belly bun, I had a few key components I needed to gather before I could assemble the buns and chow down.

First: the braised pork belly. Though I see that Momofuku appears to braise their pork belly in nothing more than salt, water, and chicken broth, I preferred following the traditional Taiwanese style of braising fatty meats.

Next up: pickled mustard greens. Packages of pickled mustard greens can usually be bought in the refrigerated section in Asian supermarkets, though selection may vary.

And then the final 2 (easier) components: crushed peanut powder and cilantro. The peanut powder (which is slightly sweetened) can be found in Chinese supermarkets, most likely in the flour section.

As soon as those 4 ingredients are ready, you’re merely seconds away from eating! Assemble by layering slices of pork belly with spoonfuls of the pickled mustard greens, a dash of the crushed peanuts and some cilantro in between a steamed bun. Adjust each component to your personal taste. If you want to, spread a thin layer of hoisin sauce (not too much, or else the flavor will be too strong). Now eat!

Taiwanese pork belly bun

Taiwanese pork belly bun

taiwanese-style Braised pork belly

Ingredients

  • 2 lbs pork belly
  • ~1/2 cup soy sauce
  • ~1/4 cup mirin rice wine
  • ~1/4 cup brown sugar
  • dash of five spice powder
  • hard-boiled eggs (optional)
  • water

Prepare the pork belly depending on how you want it to cook (i.e. the whole pork belly chunk together versus 2 inch slices ready to insert into pork buns).

Heat the pot that will be used to braise the pork belly. Stir-fry the pork belly in the pot for a few minutes to brown. Add the soy sauce, rice wine, five spice powder, sugar, and water, adjusting to taste. Make sure the liquid mixture fully covers the meat – keep adding liquid until the meat is covered. If you are braising eggs as well, throw in the peeled hard-boiled eggs to stew with the meat.

Let cook at medium heat for 30 minutes. Stir occasionally. Lower heat and continue to cook for an additional 30 minutes (though longer is okay too). Remove from heat and serve.

STIR-fried pickled mustard greens

Ingredients

  • 1 package of pickled mustard greens
  • ~3 tbsp sugar
  • oil

Drain the mustard greens and soak in water for at least 30 minutes. Remove from water and dice the mustard greens.

Heat the pan with oil and stir-fry the diced mustard greens on high heat. Add sugar 1 tablespoon at a time to adjust the mixture to taste. Remove from heat and serve.

Steamed Buns (Part I)

Steamed Buns Attempt #1 – FAILED 😦

Inspired by this recipe request (recipe wanted: pork belly buns aka taiwanese hamburger) I wanted to try my hand at making my own pork belly buns. While browsing online for the perfect recipe, I found that most people recommend you use store-bought buns – no way I was going to let that happen! So the first step in this process was to make my own steamed buns.  Before I continue, I should probably point out that this was my very first venture into baking bread (from scratch, that is; instant biscuits don’t count!), so I may have made a lot of amateur errors along the way. But bear with me, for in due time I shall learn!

Normally, I would post the recipe and the steps I took so that someone could help me identify what went wrong, but this time the error was just too large. It wasn’t about how long I let the yeast sit or how long I let the bread rise or what temperature the oven was set at – it was a problem with the pure basics. And now an important lesson: if it’s your first time baking, follow the recipes – use the right ingredients, take the right measurements, follow the steps. At least once. Until you know what you’re doing.

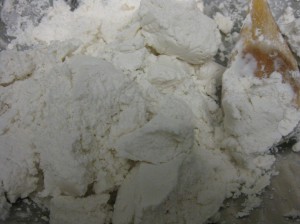
And now for the big unveil: what went wrong? Well for starters, if a recipe calls for all purpose flour or bread flour or cake flour, use it. Don’t use…rice flour.

Baking with rice flour

What a crumbly mess…

Rice flour lumps

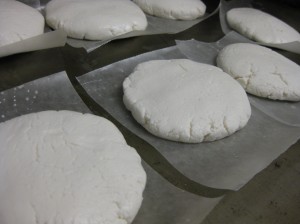
Look at those cracks! By this point, I had long since realized I was using the wrong flour and that rice flour was not, in fact, an ingenious way to spice up the recipe. But I still wanted to see what would happen…

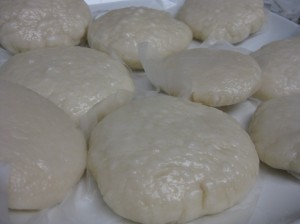
Steamed rice flour lumps

(After steaming) I actually don’t think they came out quite as bad as I thought they would. But they were extremely hard. Texture left much to be desired.

Oh well, lesson learned! Until next time…

UPDATE: There actually was a next time. I made 2 more batches of the steamed buns following this colossal disaster. Stories (and recipes) to be posted soon!

RECIPE WANTED: “Yuzu Eskimo”

RECIPE WANTED

REQUEST DETAILS: Would like a recipe for the part of the dish featured on the right – the frozen white yuzu component (I don’t even know what it actually is!) on top of raspberry foam.

ATTRIBUTES: Frozen, with almost a creamy cheesecake-like consistency, but slightly lighter. The yuzu eskimo actually is light and sweet; the tartness of the dish comes from the raspberry foam.

LAST EATEN WHERE: Spot Dessert Bar, NYC

LAST EATEN WHEN: February 2011

CURRENT STATUS: Still missing (and unidentified! What is the “eskimo”?)

Any information you can provide on where to find this recipe (or a similar recipe) is greatly appreciated.

Please help us find this recipe and its identity!

RECIPE WANTED: Australian Meat Pie

RECIPES WANTED

Meat pie and sausage roll

Pulled pork and coleslaw pie

Australian meat pie

REQUEST DETAILS: Would like an authentic recipe for Australian meat pies and sausage rolls.  Additional insight into Australian cuisine would also be appreciated (i.e. how these pies are usually eaten, what they are served with, other highlights of Australian cuisine) – this was my first time trying it!

ATTRIBUTES: Flaky buttery pastry crust enveloping a ground beef and, as of yet, unidentified sauce mixture. For the sausage roll, a thinner pastry crust wrapped around a baked ground sausage and sage mixture.

LAST EATEN WHERE: Tuck Shop, NYC

LAST EATEN WHEN: February 2011

CURRENT STATUS: Still missing

Any information you can provide on where to find this recipe or a similar recipe is greatly appreciated.

Please help us find these recipes!